Showing posts with label D.I.Y.. Show all posts

5.06.2009

D.I.Y. Simple & Cost Effective Centerpieces

For our upcoming MOPS Tea Party this week, I needed to make centerpieces for the mom's tables that I am contributing. Since we are on a budget, fresh flowers were not an option. Besides, I can use them over and over. I purchased the supplies from Dollar Tree (we finally have one close by! yay, before I had to drive way far to the nearest one!).

Sometimes with silk flowers it can be tricky to get a nice arrangement, because let's be honest - some silks look really cheesy-tacky, especially from a dollar store. So I just spent time pulling different bunches and putting them together to see what worked.


Photobucket

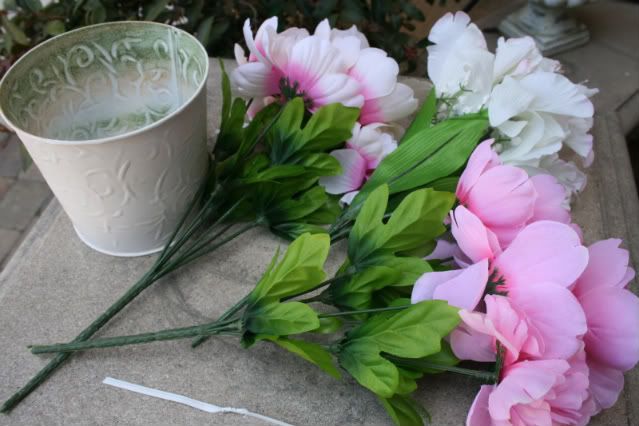
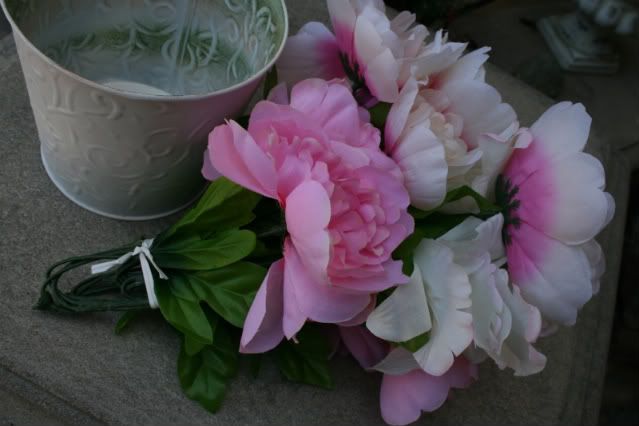
You can see the tin containers were originally an ugly green and orange brushed-on color. So I just sprayed painted the outside of the tins with my all-time fave spray paint white Kilz to get rid of the uglies. Keep that in mind when searching for cost-effective containers - "Can it be spray painted, if it needs a makeover."? Make sure your container isn't too big since it will have to be filled.

Each silk bunch stem got bent in half to fit the height of the tin. Then I bunched them together moved some of the colors around and tied securely with a wire tie. You could use florist wire, pipe cleaner wire or a chenille wire as well. Then I bent some of the flowers forward, so they would hang over the container edge.


Photobucket

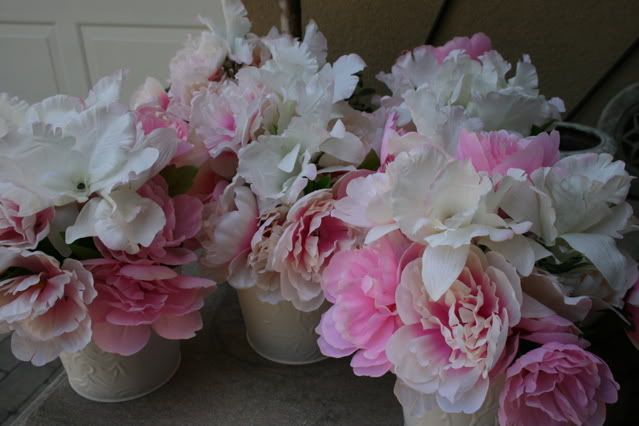
Shoved it in the container, fluffed it a bit and boom, done. After the pic I did add some pink feather tufts that I cut-up from a boa.

Total cost for each arrangement: $4
Photobucket


I will show pics of the centerpieces at the tea party later!

11.16.2007

Face Painting for Fundraising

Photo Sharing and Video Hosting at Photobucket

Last night I was able to provide face painting for my daughter's preschool fundraiser.

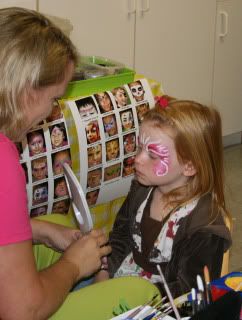
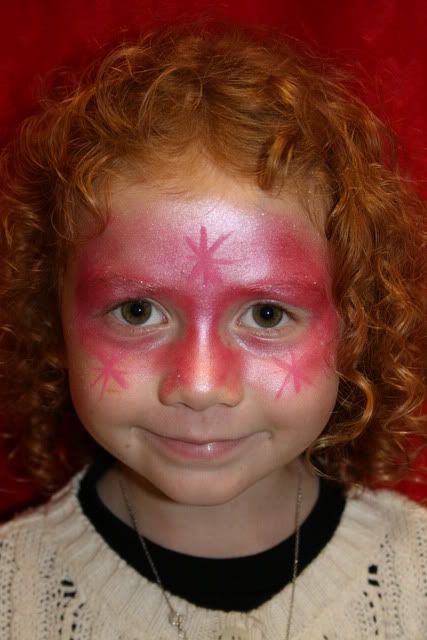
They had a Fall Carnival & Silent Auction (it was belated due to the So Cal fires and the date got pushed back), so myself and Rebecca, my fellow face painting and party planner friend came to help out. We had a great time and I think we were able to contribute to the fundraising efforts as the room was filled the entire time with children and parents who were waiting in line. Click here to view a few photos I took of the "quick design" faces I painted.

I have really been enjoying face painting more and more, it's very addictive and rewarding. Check out the site I made just for face painting:
Colorful Face Painting.com

Fund Raiser TIP:
I highly recommend face painting as a fund raiser for your school or other event. Not only does it give the event an element of partyness (is that a word?...well it is now) with kids and adults walking around with color on their faces, but it is also a form of entertainment.

Don't feel like you have to be a Picasso in order to face paint. If you decide to give it a try, here are some tips:

  • DO NOT use acrylic or tempura paints to face paint with. Even though it may say non-toxic it is not wise or safe for use on the facial area. PLEASE use products that are made just for face painting. I use Snazaroo face paints which is one of the most popular brand of face paints on the market. You can purchase Snaz products at their website (they have a discount for non-profit orgs) or from Silly Farm which is where I get my FP supplies. The best brushes to try are a Round #5 and #3 that you can buy at Michaels or Silly Farm. I like the American Painter brand.
  • Search online or Google the most popular face paint designs. It does not have to be complete, full face designs but you can do a mask, one eye or half face. Cheek art can actually take longer to paint than a quick butterfly, mask or muzzle.
  • Check out step-by-step how to's face paint designs on You Tube
  • No matter the results or outcome of your design, children don't care, they just absolutely LOVE having paint on their face!

Photo Sharing and Video Hosting at Photobucket

10.29.2007

Pumpkin Carving Party

Yesterday we had our annual block Pumpkin Carving Party. This is a party that I've coordinated since we all moved here six years ago - wow, time has flown by! I tried to find photos from the first couple of years, but unfortunately that was back when I didn't take many photos. Now I'm bummed.

To view all the photos from this party click here.

Photos from the past:

2003 (pre-third child days)

2005

2006

2007


This party is a highlight of my year. I guess because it kinda officially kicks off the holidays. Next thing you know it is Thanksgiving, then Christmas.

I wasn't even sure we were going to be able to go forward with the party due to the So Cal fires which made the air quality here in Orange County unbearable. Kids were home from school on Thurs. & Friday. But Saturday, thank goodness came some drizzling and a breeze which brought back our beautiful weather and were able to come outside again.

How To:

If you would like to plan a Pumpkin Carving Party here are some party tips:
  • Send out an Evite to your friends, family or neighbors letting them know the date and time. We also have a Chili Cook-Off and have a couple of pots of chili, hot dogs, pizza, salad and desserts. You can set-up in Evite which food assignments you need for your potluck. Also assign someone to bring paper goods such as napkins, bowls, plates, plasticware.
  • Everyone is BYOBeverages and a snack to share during the carving time.
  • Everyone needs to bring their table, chairs, table cover or newspapers, pumpkin carving tools, garbage bags, hand or diaper wipes, tea light candle and of course, their pumpkins. And their camera!
  • Ask everyone to wear colors such as black, orange or Halloween theme T-shirts.
  • We've done activities such as Halloween tattoos, crafts from Oriental Trading, cookie decorating, bounce the eyeball game etc. I was going to try to do face painting this year, but time got away.
  • For a yummy "Screamcicle" drink, last year I filled a large pickle jar with a quart of softened vanilla ice cream and a 2liter bottle of orange soda (or was it two bottles?). Stir until the ice cream is mixed. Yummy!
  • Gotta have music! To set the party atmosphere, play Halloween CD's. One of my favorite ones is Kid's Halloween Costume Party CD.
  • For the past two years, (this is in lieu of an apple dunking game), I've done a donut eating contest which has become a huge hit with the kids. Simply tie a small rope across two poles or trees. Cut curly ribbon to hang from the rope. Then tie on powdered "Ghostly Donuts" to the ribbon thru the hole, at different heights. The kids have to have their hands behind their backs to eat the donut. It is sooooo funny! They love it!


  • Then at the end of the party, we line up the carved pumpkins and had out small labels that I've printed on Avery 8167 size, that say Most Unique, Most Scary, Most Funny, Most Creative and everyone can put their stickers on the pumpkins as sort of a contest. Everyone wins!

It's a great party.....


10.25.2007

Isabelle's First Birthday Party

It was a lot of fun planning Isabelle's First Birthday Party. I've done First Birthday Parties before....my own kids.

The mom wanted a party that was cute and elegant. So to come up with new ideas for this party was a fun challenge. What I mean by challenge is how to make a cute, "elegant" party for wee little ones - mostly two years and under. Snacks for little hands were provided, and sippy cups were at each setting. I fluffed up the Birthday Girl's high chair with pink organza and marabou trim around the tray. Initially, I wanted to have a lady come out and do child's hand impressions in clay, but it would have gotten rather pricey. So I came up with the idea to have them have painted hand and foot on canvas boards as an activity and take home favor. It was so much fun painting their chubby little hands and feet! Then I sprayed it with a paint sealer.

The take home goodie bags consisted of a custom photo cookie that I did the photo graphic and had made by Schmerty's Gourmet Cookies. They are wonderful at this bakery and very quick with shipping! Then I made "The Best Homemade Play Dough" in pink and green colors presented in a jar with a personalized label and a copy of the play dough recipe.


I decided to use my new thrift find that I painted, add a foam ball covered in silk flowers and ribbon. I think it was either a votive holder or my friend thinks it is a wine bottle holder. Then made paper cones from 12x12" scrapbook paper.

Here is the before and after of my cone holder:

Click here to view my photos from this event. The client had their professional photographer there, as they did a family portrait before the party. It was such a pleasure to see Melinda Kim in action and I can't wait to get the images of the party that she took - they looked amazing from what I could see in her view screen! Will post the photos later when I get them.

Here is the recipe for the play dough, the cream of tartar is what makes this one the most like the real thing:

The Best (and Baby Safe) Homemade Play Dough Recipe
4 cups flour
4 cups water
1 cup salt
1/2 cup cream of tartar (approx. a 2.5 oz. size)
4 tablespoons of vegetable oil
Variation: Add one package of unsweetened powdered Kool-Aid while mixing. This will give it a nice smell and will add a slight color to it.

Mix all ingredients in a large sauce pan. Heat and stir over low to medium heat, use a whisk to get out flour lumps. Continue to stir – consistency will first look like cake batter, then lumpy then clumpy. Stir until it becomes dough, completely formed and no longer sticky. Allow to cool slightly, knead a little bit to form a big ball before storing in an air tight container or zippy bag.

7.30.2007

Wedding ceremony and thimbles

The tip of my finger is still numb.

On Saturday I conducted a ceremony only. Very sweet couple and so were their friends and family.

The set-up was very simple, and they had everything under control. So to be useful, I offered to help them with pinning on the corsages and boutonnières. About 19 of them.

I have put on a few hundred corsages and boutonnières in my career, with speed and accuracy and absolutely NO PIN showing. Yes, I pride myself in fixing the one who has a "bout" totally askew and pin sticking out from a fellow buddy who attempted to pin it on him, or a grandmother who's corsage is limping to the side because there was nothing to anchor it to on her flimsy georgette fabric dress.

But these were silk flowers. They were pretty cymbidium orchid silk flowers fashioned into corsages and bouts. Translate: very hard, thick plastic "stems". So I am pushing, and pushing and pushing pins into these suckers with as much grace as I could muster considering the hardness of the stem. I seriously could have used a thimble.

The tip of my right index finger was pretty sore after all that, and seriously - it is still numb on the tip!

It was a fairly warm, muggy (for OC) July day, and I thought this was a clever idea the bride did for fans. The ceremony program was printed on the outside of a folded two page program, then the wooden stick was glued to the inside. So this version may be a lot less expensive than having ceremony fans printed.

Here is how you can D.I.Y. your own fan programs:

Purchase program card stock, either printed from the dealer, or blank and print at home. Another option, print and then fold a piece of 8.5" x 11" card stock in half. Use a bone folder or a ruler to press the edge down.

Purchase the wooden sticks, which need to be longer and bigger than traditional tongue depressors.

Place double-stick tape to the program edges, hot glue gun the sticks to the inside and press. Add a ribbon in your color(s).

This idea can also be used for menu cards if you are having a daytime outdoor event or meal.


3.13.2007

Hey, cut it out!


Found these cute cutouts on eBay. They are approximately 3 1/4" to 3 5/8" tall, made out of birchwood.

I'm going to paint them and do ___________ with them { not sure }.

Any suggestions? What would you do with them?

3.10.2007

My Cupcake Cuddler


Sometimes it just doesn't stop. It's like a 80's song that is looping in the background of my head.

Creative epiphanies.

It's sometimes annoying and I wish I could turn it off, like the 80's song. So many times throughout my day I will be doing one thing, and I'll have a creative thought and then I'm off doing the new thing to see how it'll turn out. I swear I have Adult ADD.

I have a bridal shower tea party coming up on April 15th, and the bride-to-be wants some "suthern" touches to it and wants a red velvet cake. So instead of the traditional sheet cake, I suggested red velvet cupcakes. But I wanted to dress them up a bit. Just ribbon wasn't enough.

{ Side note - whenever I hear of red velvet cake,
Steel Magnolia's "Nothin' like a good piece of ass" quote from Drum Eatenton always comes to mind. Greatest movie with the greatest memorable quotes, ever! }

So the other day, there is a stack of paper doilies on the counter and I had a creative epiphany to make them into a cupcake cuddler. I took a 6.5" doily, put a water bottle on top of it, and wrapped the doily up and around it. Then I laid the bottle and doily on it's side, then tied the ribbon around it. Done!

Of course I eventually HAD to eat the cupcake (from Trader Joes - so good, a dense very-vanilla cake with cream cheese frosting....mmmm....all 20 fat grams of mmmm!) so it was so easy to just pull the ribbon and eat it off the doily. Pretty and functional!

You spend me 'round, 'round, baby
'round, round
Like a record baby, 'round, 'round...

3.04.2007

Let Them Eat (Teapot & Teacup) Cakes


I have high aspirations to someday make some of the creative tea theme cakes I've come across. I have every size frosting tip, tons of bags, supplies, sprinkles galore and a bunch of molds - yes, I even admit that I fell for buying the Bake 'n Fill cake dome molds - remember those commercials?. It's still in box....but I have everything I would ever need JUST IN CASE (part of my event planner hoarding issue I have) I want to make a cake.

But let's be honest, if I need a theme cake I'll probably end up calling one of my
amazing cake vendors to make it for me! But I definitey want to try it out someday.

Here are some links for how to's for these teapot & teacup cakes.

The Southern Living teapot cake (as seen here)

The Wilton teapot & teacups directions.

A variety of tea party cake photos from real cake makers at Coolest Birthday Cakes

Blog Widget by LinkWithin